In this tutorial, we will learn how to create a Discord bot using the Go programming language.
Create Discord Server
For you to create a bot for Discord, you will need a discord server where you are the admin. You can do by opening your browser and navigating to the discord site:
Login to your Discord account and create a server for testing. In our example, we create a tutorial called "tuts server"
Once you have a test server, you can proceed to create an application for your discord bot. Open the Discord developer portal:
Click on the New Application button to add a new discord application. Set the name for your application and click create.

Once the application is created, click to open it from the list of your available applications. Next, select the Bot option on the left menu.

Click on Add bot to create a new bot for your application. This will create a new bot with a new bot token. Copy and save the bot token.

Next, navigate to the bottom of the page and select the permission for your bot.

Once you have the permissions of the bot set, open your browser and navigate to the following resource:
https://discord.com/oauth2/authorize?client_id=[client_ide]&scope=bot
Where the client ID is the Client ID for your application. You can find this ID in the OAuth section of your application:

The above resource allows you to add your bot to your server.
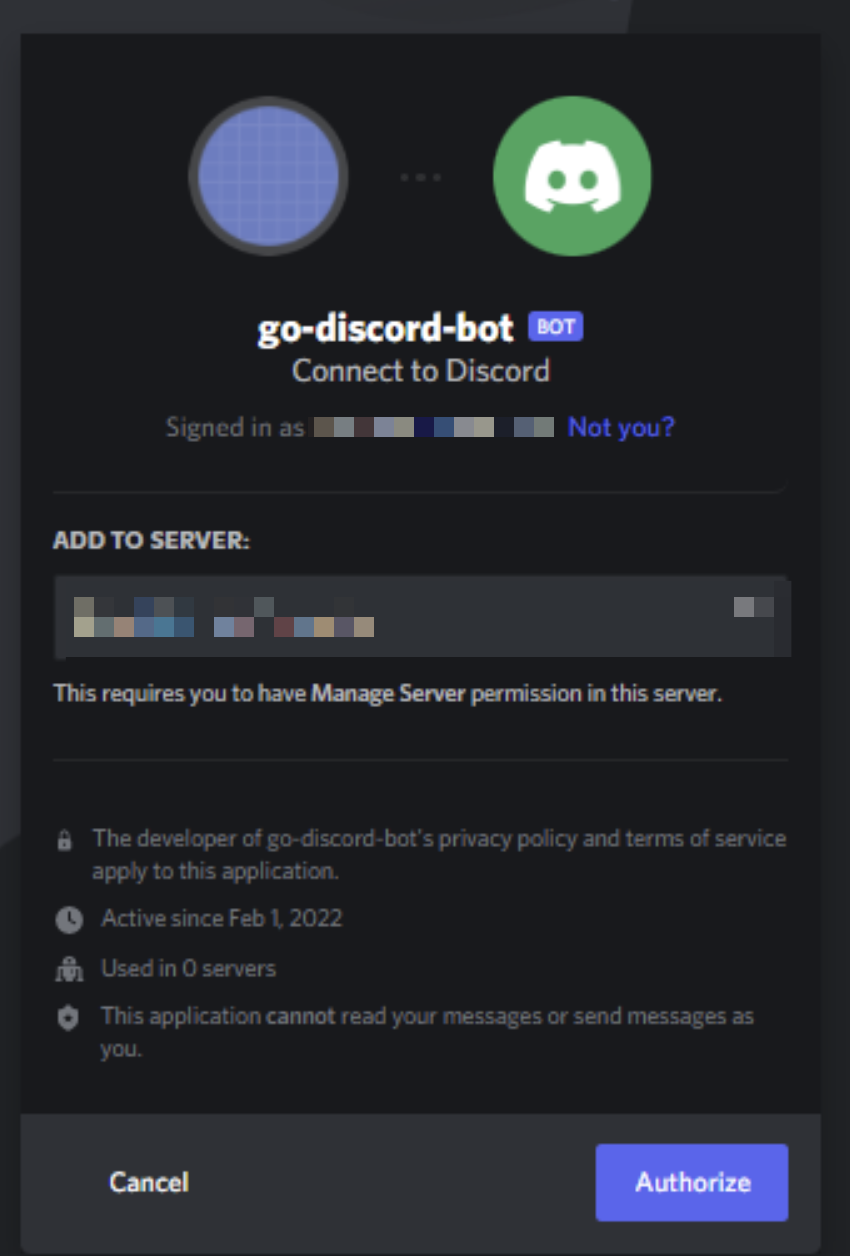
Select your server and click authorize.
Building A Discord Bot
Once we have the Discord Application and Bot configured, we can proceed to create a discord bot. For this guide, we will use the DiscordGo package, which provides low-level functionalities for working with Discord API.
Start by creating a working directory to store the code for your discord bot.
mkdir discord-botNavigate into the directory and initialize the mod manager for your project:
cd discord-bot
go mod init discord-bot
go mod tidy
The next step is to create the project structure. Start by creating config and bot directories:
mkdir config botThe config directory will act like the package that reads the configuration for the Discord Server. The bot folder holds the code for the discord bot.
Next, create main file which we will use to start the bot. In the main.go file, add the following code:
package main

import (
	"discord-bot/bot"
	"discord-bot/config"
	"log"
)

func main() {
	err := config.ReadConfig()
	if err != nil {
		log.Fatal(err)
		return
	}

	bot.Run()

	<-make(chan struct{})
}
In the example above, we start by importing the code exported by the config and bot packages. We will add the code for these packages in the upcoming sections.
We then call the ReadConfig() method from the config package. Finally, we run the bot using the Run() method from the bot package.
The next step is to set the configuration for your bot. In the root directory, create a config.json file and add the following entries:
{
    "token": "OTM3OTU0MDY1OTU3MTMwMjcw.YfjPyw.gEBRCbQzJGrVcHTFBVCJ2yWuZl4",
    "prefix": "!"
}
The JSON file contains the token for your bot as copied in the previous steps. The next is the prefix which defines the prefix to follow to invoke a bot command. Learn more about bot prefix in the resource below:
Next, navigate into the config directory and create a config.go file. In the config.go file, add the code as shown below:
package config

import (
	"encoding/json"
	"io/ioutil"
	"log"
)

var (
	Token  string
	Prefix string
	config *configStruct
)

type configStruct struct {
	Token  string `json:"token"`
	Prefix string `json:"prefix"`
}

func ReadConfig() error {
	file, err := ioutil.ReadFile("./config.json")
	if err != nil {
		log.Fatal(err)
		return err
	}

	err = json.Unmarshal(file, &config)
	if err != nil {
		log.Fatal(err)
		return err
	}

	Token = config.Token
	Prefix = config.Prefix

	return nil
}
In the code above, we start by importing our required packages. This include the encoding/json to marshal the JSON config, ioutil to read the config file and log to log any errors.
Next, we define the structure to store the values read from the JSON file. We then proceed to create the ReadConfig function. This function uses the ioutil method to read the config.json file. We then use the JSON data and unmarshal it using the json.Unmarsal() method.
Next, navigate into the bot directory and create a bot.go file. This will hold the source code for the bot.
Add the source code as:
package bot

import (
	"discord-bot/config"
	"log"

	"github.com/bwmarrin/discordgo"
)

var BotID string
var goBot *discordgo.Session

func Run() {
	// create bot session
	goBot, err := discordgo.New("Bot " + config.Token)
	if err != nil {
		log.Fatal(err)
		return
	}

	// make the bot a user
	user, err := goBot.User("@me")
	if err != nil {
		log.Fatal(err)
		return
	}

	BotID = user.ID
	goBot.AddHandler(messageHandler)

	err = goBot.Open()
	if err != nil {
		return
	}
}

func messageHandler(s *discordgo.Session, m *discordgo.MessageCreate) {
	// Ignore all messages created by the bot itself
	if m.Author.ID == BotID {
		return
	}

	// If the message is "Hi" reply with "Hi Back"
	if m.Content == "Hi" {
		_, _ = s.ChannelMessageSend(m.ChannelID, "Hi Back")
	}
}
The code above uses the DiscordGo package to define the functionality of the bot. You can learn more in the resource below:
Once completed, run the file as:
go run main.goThis should start the discord bot. Go to your discord server and type Hi. If the bot is running correctly, it should return Hi Back.
Conclusion
This guide covers how to create a discord bot using Go and DiscordGo package.


-1.png)
